If you have not gone through part-1(istio), I would recommend you to please visit- https://osquery.net/service-mesh-1/ & the labs are identical for this blog also. It really took a few days of effort.
Linkerd uses a Rust-based micro proxy called Linkerd2-proxy. 
Arch- Let's start with control plane components. The proxy injector components work as an admission controller. when a new pod is created it checks if the manifest has linkerd.io/inject: enabled annotation & adds proxy-init and linked-proxy containers to the pod. After the proxy is injected it sends gRPC request to the identity and destination service. The identity service acts as a Certificate Authority that accepts certificate signing requests from proxies and returns signed certificates. The destination service first fetches policy information about where the request is allowed, routes, protocols, etc.
Installation:
1. Install the CLI on your host machine
$ curl --proto '=https' --tlsv1.2 -sSfL https://run.linkerd.io/install | sh
2. export PATH=$PATH:$HOME/.linkerd2/bin
3. Validate your Kubernetes cluster
$ linkerd check --pre
4. Install Linkerd onto your cluster, similar to istio this also adds a bunch of CRDS
$ linkerd install --crds | kubectl apply -f -
$ linkerd install | kubectl apply -f
5. install viz extension for monitoring if you want.
$ linkerd viz install | kubectl apply -f -
Multiple ways of injecting sidecar-
1. Imperative way
kubectl -n secured get deploy NAME -o yaml | linkerd inject - | kubectl apply -f -
kubectl get -n NAMESPACE deploy -o yaml | linkerd inject - | kubectl apply -f -
2. in the manifest file you can write an annotation as below or setup a mutating webhook to automatically add label.
template:
metadata:
annotations:
linkerd.io/inject: enabled
3. Make sure to kubectl rollout restart after adding annotations.
MTLS
we have already discussed what is mtls, why it is required in the previous post.
MTLS is automatically enabled by linkerd when proxy is injected. But unlike istio it doesn't have modes, So only mesh-enabled services can communicate with each other.
For lab let's recreate 2 namespace secured and legacy, and also deploy our a & b service. Secured will have proxy sidecar added and Legacy doesn't.
By default, linkerd allows communicating from non-mtls services but the communication will be non-encrypted & for a service that has service mesh the communication is encrypted. As you can see from the screenshot below -
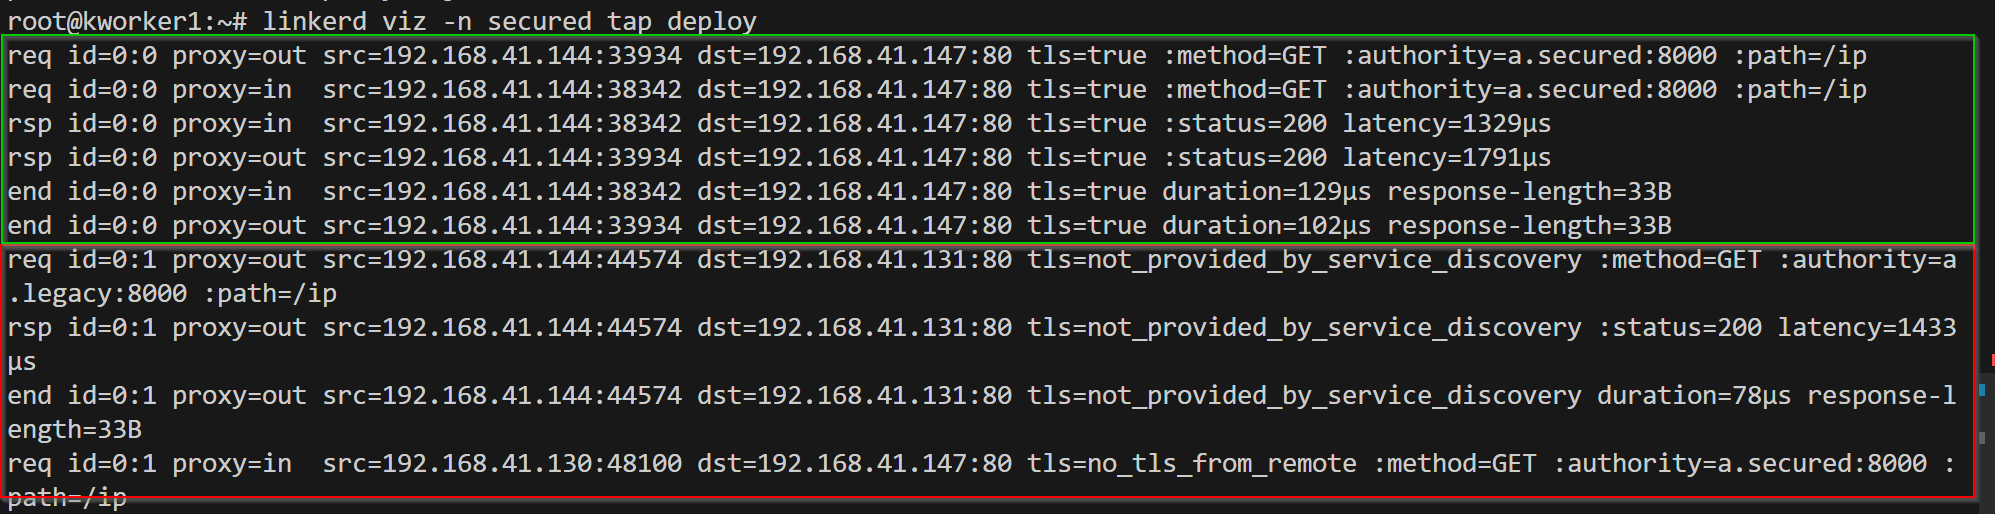
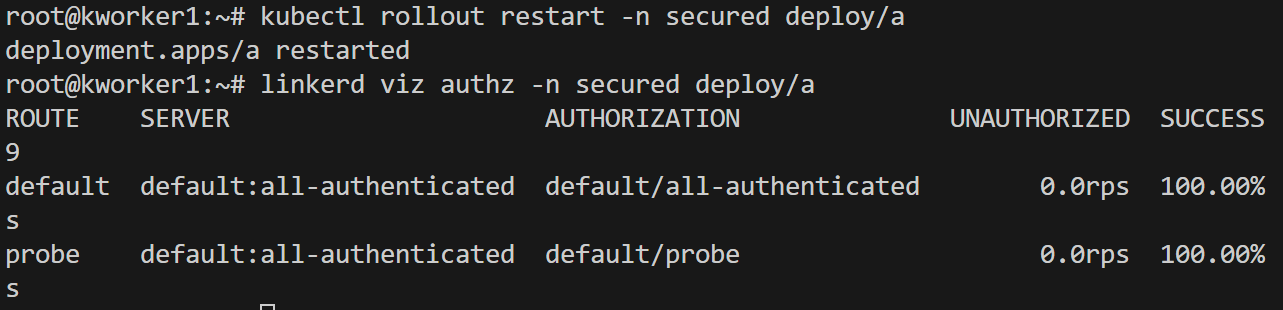
why did this happen? By default "default-inbound-policy" is set to "all-unauthenticated". Now lets only allow meshed clients which have mtls. This can be done by overriding the default config by setting annotation "config.linkerd.io/default-inbound-policy" in pod or namespace.
kubectl edit ns secured
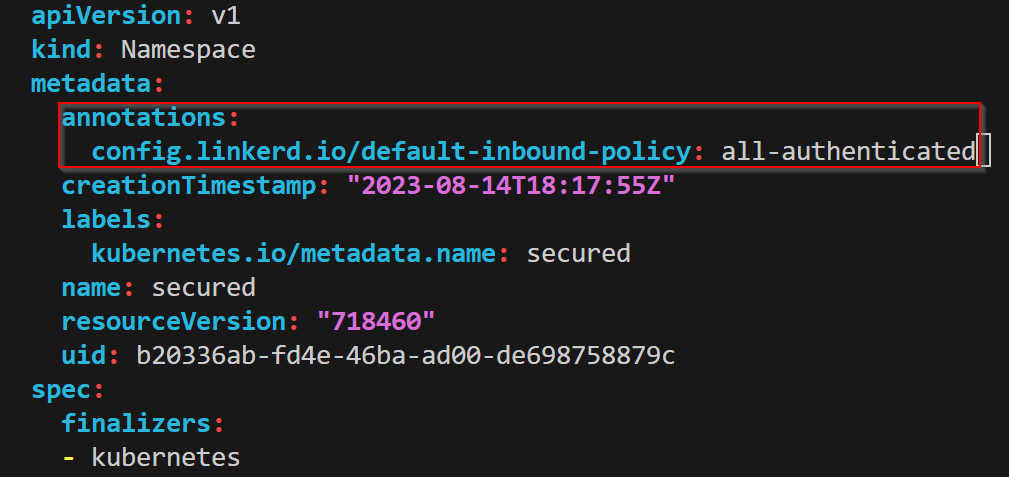
And the result !!!
Implementing Authz/AuthN
Let's deploy our
upload service in the test namespace. Now create a
server custom resource object. Istio controls outbound traffic using virtual service objects and gateways seamlessly. In linkerd we have to create a server, then apply policies above it.
Server policy by default rejects all the connections, as you can see above. Now let's apply an
authorization policy to allow communication from the "b" service of the "secured" namespace.
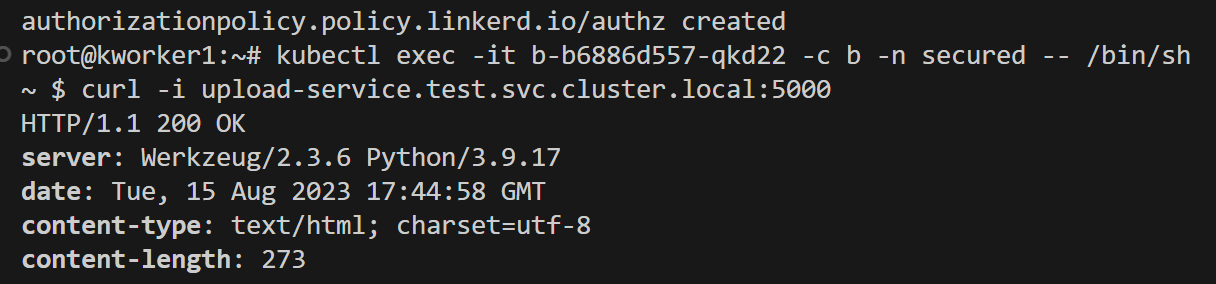
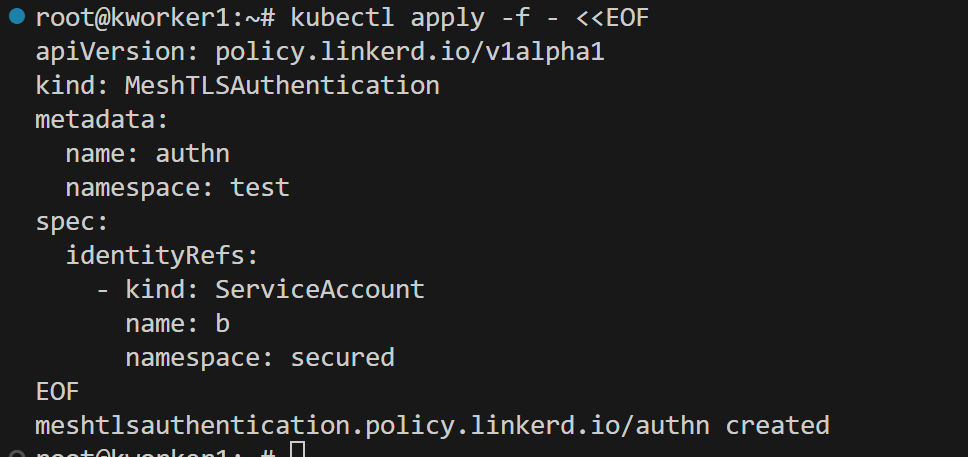
As you can see after applying policy, we are able to communicate. In terms of authentication, linkerd doesn't have support for external authentication using Auth0, or JWT, unlike istio. But there is MeshTLSAuthentication, which identifies clients from mesh identity.
So let's apply our
authn policy.
Controlling http Traffic using HTTPRuote & Using this for incident response
We have seen in the previous blog how HTTP traffic control can be used for incident response in case of urgency. But in linkerd, it's a bit complicated to implement routing policy, whereas in istio you can apply policies on pods, and deployments. In linkerd, you have to create an
HTTPRoute and attach that to a server. So Let's clean up the old lab setup and deploy our
upload service, create a
server, attach
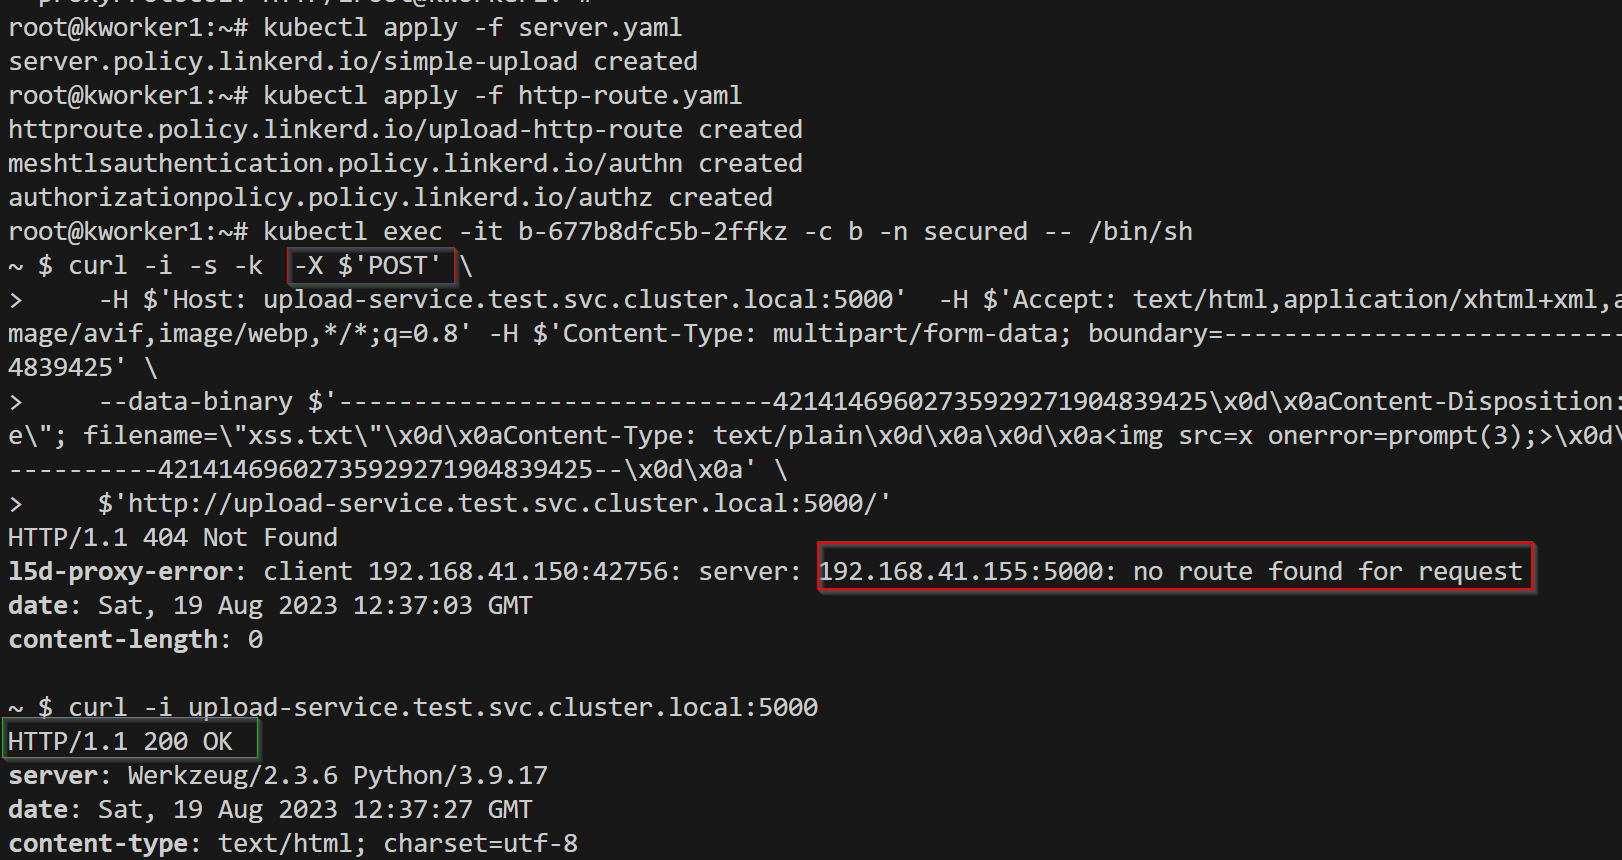
HTTPRoute to allow only GET requests, and implement authz/authn to allow "b" service.
As you can see we are not able to send "POST" requests but are able to send "GET" requests.
Conclusion
Personally I didn't like linkerd, because I want more control and customization . Istio supports external authentication using Auth0 JWT , linkerd doesn't have this as of now, but it will be added in 2.14 version. Also I found implementing policies are difficult in linkerd. One advantage of linkerd is it's very lightweight and most of the things are on autopilot, which is good for beginners.


Awesome article !!!
Very useful